2801
Cause
Document is jammed in ADF (Auto Document Feeder).
What to Do
 Important
- Do not open the document cover if the document is jammed. The jammed document may be torn.
- Be careful not to let anything get inside the document output slot of the ADF. It may cause damage.
If the original remains in the ADF by pressing the printer's Stop button while the printer is scanning:
The message about the paper remained in the ADF appears on the printer's LCD.
Press the printer's OK button so that the remaining document is automatically fed out.
If the original is jammed in the ADF while the printer is scanning:
Remove the jammed document following the instructions below.
If printing is in progress, press printer's Stop button.
Turn off printer.
-
Slowly open document feeder cover.
Open the document feeder cover after removing any pages other than the jammed page from the ADF.
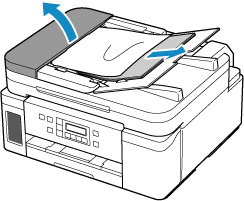
-
Remove jammed document.
If you can grasp the jammed document firmly from upper side of the ADF:
Hold the document firmly and pull it out slowly.
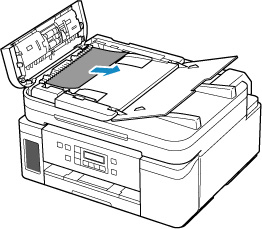
If you cannot grasp the document firmly from upper side of the ADF:
-
Close document tray.
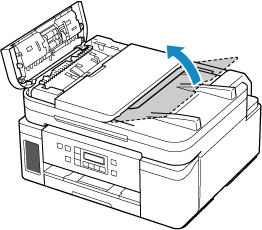
-
Slowly pull out the jammed document from the document output slot.
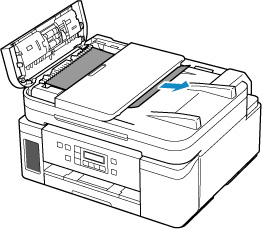
If you cannot remove the jammed document from upper side of the ADF or the document output slot:
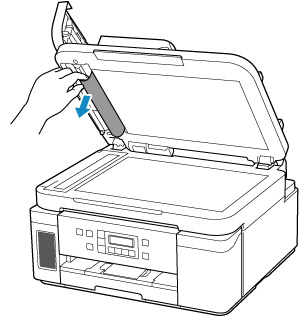
Open the document cover and slowly pull out the jammed document from the back of the ADF.
-
-
Close document feeder cover and turn on printer.
When scanning the document again, rescan it from the first page.
 Note
Note-
The document may not feed properly depending on the media type, or your environment, such as when the temperature and humidity are either too high or too low.
In this case, reduce the number of document pages to approximately half of the loading capacity.
If the document still jams, use the platen instead.
-
If the measures above do not solve the problem, contact your nearest Canon service center to request a repair.
 Important
- Do not tilt the printer when moving it since the ink may leak out.
- When transporting the printer for repairing it, see Repairing Your Printer.

